
To upload ingredients into the Pantry use the four buttons located at the top of the page: Download Template Spreadsheet, Import from Spreadsheet, Add Custom Ingredient, and Filter.
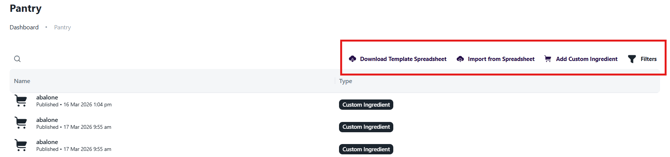
Bulk Importing Ingredients into Pantry

Within the ingredients tab, you will see four pre-filled example rows to guide formatting. The spreadsheet also includes color-coded columns: green columns indicate required fields that must be completed for each ingredient, including information typically found on a Nutrition Facts Panel, while yellow columns represent optional fields.
When entering ingredient names, it is important to use terms that the AI can clearly interpret. For example, use “whey protein isolate” rather than abbreviated terms like “whey prot iso.” The Item ID field can be customized using terms your team would typically search for when locating ingredients.
Once your spreadsheet is complete, you can upload your ingredients by selecting Import from Spreadsheet. After choosing your file, the system will process the data and add the ingredients to your Pantry.
Should there be missing or mislabeled information in your spreadsheet, the validate ingredients screen will provide feedback on the errors that need to be corrected.
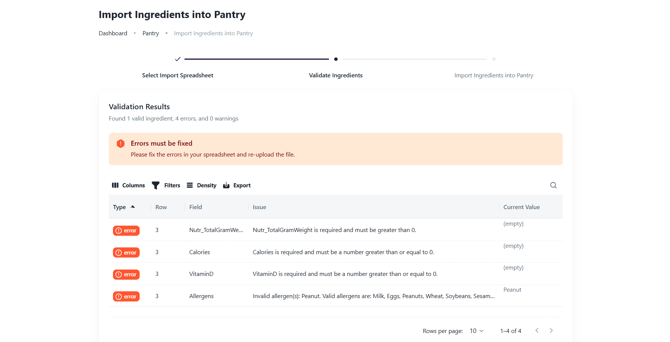
After correcting errors on your spreadsheet, use the back button to return to the "Select Import Spreadsheet" step and reupload your sheet. If there are no errors, you will receive a validation was successful page. To finalize the import, click the import button.
Once uploaded successfully, your new ingredients will appear in the Pantry and be available for use across formulations within your tenant.